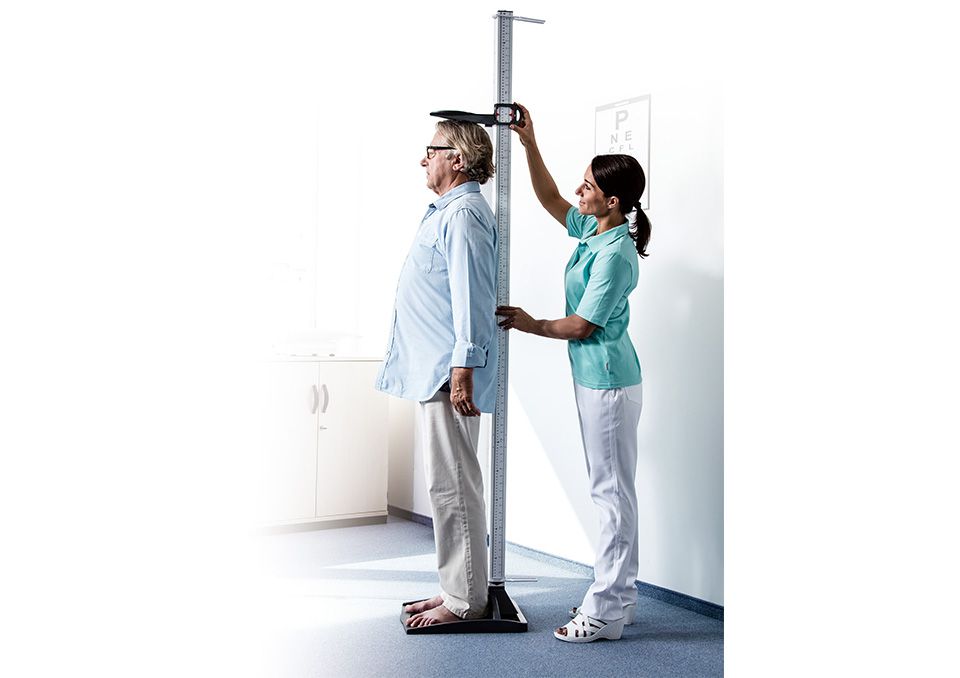
Charder Portable Stadiometer HM200P
The Charder HM200P portable mechanical stadiometer disassembles into 5 pieces that store in the base for easy transportation using the included carry case. It can be set up nearly anywhere for measurement at home, schools, offices, or clinics.
This Portable Stadiometer has a height range of 5.5″ to 78.75″ with 1/8″ graduations. The Charder HM-200P Stadiometer is highly portable for measuring height in any location, making it ideal for traveling nurses, physician’s offices, and hospitals. This Stadiometer is durable, and lightweight with all-plastic construction. If measuring at a wall, the unique stabilizers give added support to the Portstad Stadiometer, ensuring consistent and accurate measurements.
Find the HM200P on CharderScales.com
How to assemble and use the Charder HM200P Portable Stadiometer
- Location: Make sure you have sufficient illumination with a stable, secure, and flat surface (not on carpet).
- Set up the base: Place the base of the stadiometer on the floor close to a wall.
- Attach wall support: Attach one wall support to the base and the other to the height rod part d (you may need to remove the rubber stopper).
- Attach headpiece: Slide the headpiece onto height rod part d.
- Assemble height rod: Starting with part a, assemble the height rod on the base. Follow the arrow on the height rod part a and make sure that you hear a click sound as they lock together. Continue locking each part with the corresponding part numbers up to height rod part d.
- Confirm level: Make sure that the wall supports touch the wall behind the stadiometer.
- Position the patient: Have the patient remove their shoes and socks. Position the patient with their back against the stadiometer. Make sure their heels, buttocks, shoulders, and back of the head are lightly touching the stadiometer. Have the Patient look straight ahead to establish a Frankfurt Plane.
- Read the height: Bring the headpiece down until it rests on the patients head and read the height measurement from the red arrow on the side of the stadiometer. The measurement will be displayed in either centimeters or feet and inches, depending on your chosen unit of measure.
- Record the measurement: Record the measurement on a chart or electronic record-keeping system.
- Disinfect: Wipe down the base of the stadiometer with a disinfectant solution between each patient.
- Disassembly: Move the headpiece to height rod piece a to ensure that it does not fall. Start by unsnapping height rod part d and work your way down to height rod part a. Carefully remove the headpiece as this is the part that is most often damaged during disassembly.
- Pack up the stadiometer: Snap the height rod pieces into the base plate and rock in the headpiece. Store the stadiometer in its carrying case for safe transport.
With proper care and maintenance, the Charder HM200P portable stadiometer can last for many years of accurate height assessments.
